Your Free Publishing School!

-

22-01-2023
Same Cascadia, New Management!
-

16-04-2025
How the Trade War Could Affect Your Business Book: 10 Questions Answered
-

03-12-2024
Platform, Patience, Proposal: The Three Keys to Traditional Publishing Success
-

26-11-2024
NEW PODCAST: All About Writing with Bennett R Coles & Sara Dahmen
-

29-05-2024
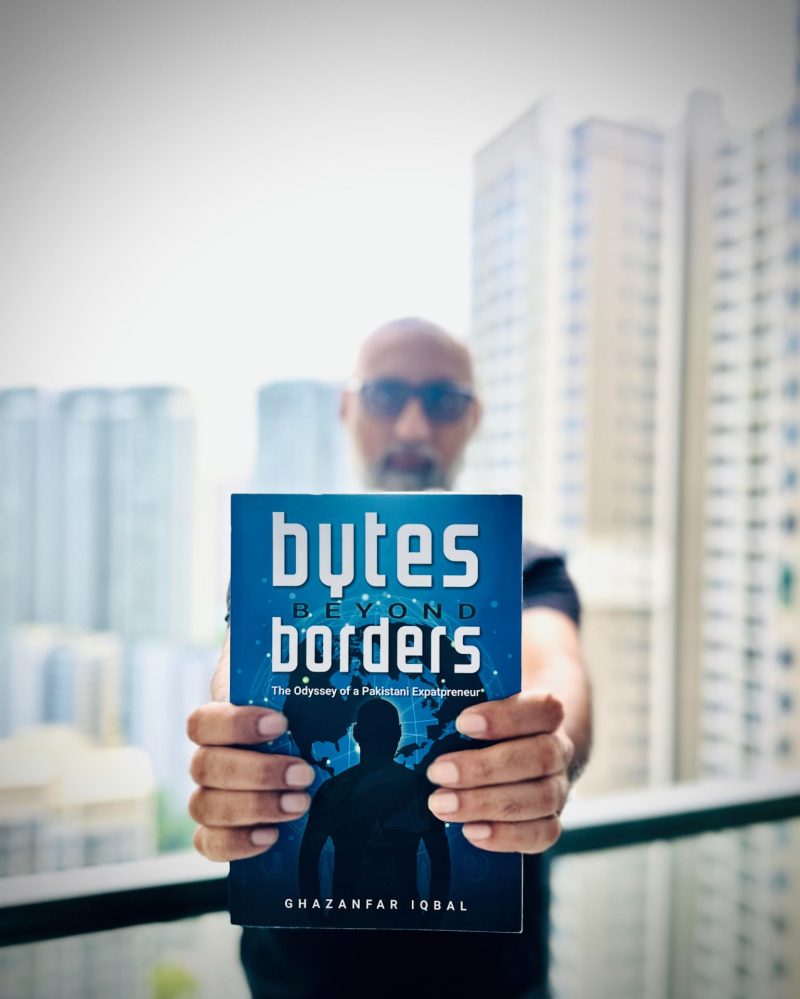
The Inevitable Journey of Ghazanfar Iqbal: Expatriate, Entrepreneur, and Author
-

04-04-2024
Publishing for Peace: Author Ben JS Maure Inspires Canadian Peacekeepers
-

30-11-2023
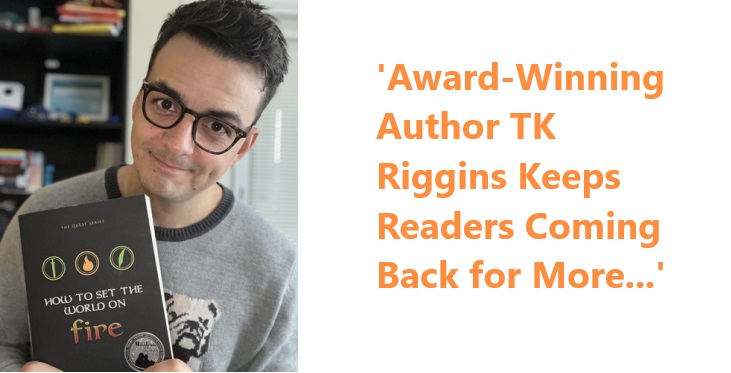
Unleashing Literary Flames: Award-Winning Author TK Riggins Keeps Readers Coming Back for More with 7-Book Series
-

15-11-2023
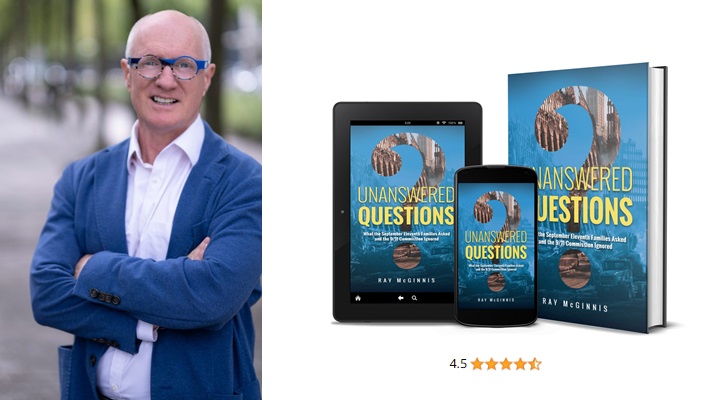
Author Ray McGinnis Reaches an International Audience with 100+ Interviews in 2 Years
-

14-11-2023
Books Without Borders: Launching Johanna Crawford’s Book at Frankfurt Book Fair 2023
-

12-10-2023
Pastor Owen Williams launched his book as a #1 bestseller and reached 450k+ people
-

24-04-2023
Mastering the Art of Analogies: Examples and Tips for Nonfiction Writers
-

19-04-2023
Build Your Brand & Expand Your Reach with an Author Website: Tips & Tricks
-

17-04-2023
What is a Memoir? A Comprehensive Guide for Nonfiction Writers
-

12-04-2023
How to Write a Summary: Mastering the Art of Nonfiction Summarization
-

11-04-2023
Nonfiction Topics: Ideas to Ignite Your Creative Writing Journey
-

08-04-2023
Nonfiction Defined: A Guide for Aspiring Writers
-
06-04-2023
How to Format a Manuscript: The Ultimate Guide
-

04-04-2023
Types of Nonfiction: A Comprehensive Guide for Writers
-

23-03-2023
From Idea to Publication: How to Write a Book Proposal
-
15-03-2023
Mastering the Art of Writing in Third Person
-
13-03-2023
Good Book Ideas: Simple Concepts & Proven Formats for Nonfiction
-

11-03-2023
How to Write a Body Paragraph: A Guide for Nonfiction Writers
-
10-03-2023
Discovering Your Voice: How to Master Different Tones in Nonfiction Writing
-
07-03-2023
Things to Write About: Fresh Ideas to Ignite Nonfiction Writers’ Minds
-

05-03-2023
Persuasive Writing: Examples and Tips for Nonfiction Writers
-
03-03-2023
List of Strong Verbs: 300 Powerhouse Words for Nonfiction Writers
-

28-02-2023
How to Design a Book Spine
-

28-02-2023
7 Essential Steps for Outlining a Nonfiction Book
-

27-02-2023
Publishing: What Is an Imprint Page (and Why Do You Need It?)
-

16-02-2023
Developmental Editing for Nonfiction Writers: A Complete Guide
-
12-02-2023
Hook Writing: A Complete Guide for Nonfiction Writers
-

11-02-2023
The Importance of Typesetting: A Guide for Nonfiction Authors
-
09-02-2023
How to Improve Your Analytical Writing Skills: Tips and Guidelines
-
05-02-2023
Modern Fonts for Nonfiction Writers: A Comprehensive Guide
-

31-01-2023
How to Master Narrative Nonfiction – A Guide to Telling Great True Stories
-

30-01-2023
How to Quote a Quote: A Guide
-

24-01-2023
How to Get a Book Published (Step by Step)
-

24-01-2023
What Is a Paperback Book?
-
22-01-2023
The 5 Best Professional Fonts for Nonfiction Books
-
22-01-2023
When to Write Out Numbers In Nonfiction Books
-
21-01-2023
What Is Bias In Writing?
-

21-01-2023
Excerpt Definition and Meaning
-

27-12-2022
The Essentials of Writing: A Guide to Crafting Clear and Effective Content
-

24-12-2022
Writing the Perfect Non-Fiction Closing Statement: Tips and Tricks From an Expert
-

21-12-2022
Book Jacket: How to Create the Perfect Nonfiction Jacket
-

19-12-2022
What Are The Five Steps in the Writing Process?
-
14-12-2022
How to Get an ISBN for Free
-

10-12-2022
How to Cite a Quote from a Book
-

05-12-2022
How to Write a Book Dedication
-

02-12-2022
Pen Name: How to Choose One
-
26-11-2022
Why And How to Set Writing Goals
-
24-11-2022
Why Is It Important to Proofread Your Writing
-
23-11-2022
What Is Informative Writing?
-
22-11-2022
What Is a Paradox? (With Examples)
-
15-11-2022
7 Tips For Writing an Effective Personal Narrative
-

10-11-2022
How to Boost your Manuscript With a Writing Conventions Checklist
-
05-11-2022
What Is Parallelism And How to Use It in Nonfiction?
-
20-12-2021
A Complete Guide to Character Arcs: The Foundation of Fiction Writing
-
20-12-2021
Five Types of Conflict in fiction: And How to Write Them
-

17-11-2021
Different Types of Irony Used In Writing Fiction Books
-

17-11-2021
The Second Person: Powerful and Vulnerable
-

30-10-2021
Character Development: A Guide for Fiction Authors
-
29-10-2021
The 6 Essential Elements of a Story: A Guide for New Fiction Authors
-

07-10-2021
What is an Epilogue? 5 Tips to Write a Great One
-

06-10-2021
The Power of the First Person Point of View
-

25-06-2021
Business Writing Essentials: Types, Principles and Effective Skills
-

25-06-2021
Dialogue Writing: Strategies to Keep it Tight and Avoid Unnecessary Words
-

20-05-2021
Creative Nonfiction: What It Is, Why You Should Use It And How
-

07-05-2021
How Many Sentences Are In A Paragraph?
-

06-05-2021
5 Things You Should Know About Writing Realistic Fiction
-

05-05-2021
Punctuation Marks: A Guide for Nonfiction Writers
-

05-04-2021
How to Use Extended Metaphors: 7 Practical Steps
-

19-08-2020
What are the Different Types of Nonfiction Editors?
-

19-08-2020
How to Make a Book Cover for a Nonfiction Book
-
15-08-2020
What Are the Ideal Book Sizes for Your Nonfiction Category?
-

09-08-2020
How Do You Use the Active Voice in Nonfiction Writing?
-
06-08-2020
How to Print Your Amazon Book on Demand in 3 Easy Steps
-
21-07-2020
Learn How to Nail the Writing of a Nonfiction Paragraph
-
17-07-2020
How to Write the Perfect Introduction for Your Nonfiction Book
-
17-07-2020
Learn How to Write a Nonfiction Outline in 5 Easy Steps
-
17-07-2020
The Ultimate Book Design Guide for Nonfiction Authors
-
17-07-2020
What is a Transition in Writing? A Nonfiction Guide
-
13-07-2020
What is a Contraction in Writing? (Includes 129 Examples)
-
12-07-2020
What is the Passive Voice in Nonfiction Writing?
-
26-05-2020
How to Write a Biography in 8 Easy Steps
-
25-05-2020
How to Write Your Memoir in 9 Easy Steps
-

19-05-2020
711 Paragraph Transition Words for Nonfiction Authors
-
18-05-2020
How to Write an Autobiography that Sells in 10 Easy Steps
-

15-05-2020
How to Create an Amazon Author Central Account Step-by-Step
-
13-05-2020
How to Format a Nonfiction Book Outline
-
27-04-2020
Paragraph Introduction Examples for Nonfiction Writers
-
16-04-2020
Sentence Structure Primer for Nonfiction Authors
-
15-04-2020
Learn How to Cite Books in Nonfiction
-
14-04-2020
Standard Nonfiction Disclaimer for Copyright Page [With Examples]
-
13-03-2020
What is a Nonfiction Ghostwriter?
-
13-03-2020
The Top 5 Strategies of Nonfiction Writers
-
27-02-2020
The Guide to the CreateSpace Independent Publishing Platform
-
23-02-2020
How to Nail the Writing of Your Nonfiction Book Introduction
-

20-02-2020
The Top 5 Skills of a Nonfiction Writer
-
19-02-2020
How Long is a Paragraph in Nonfiction?
-
18-02-2020
How Many Different Types of Nonfiction Writers Are There?
-
14-02-2020
The Hidden Costs of Publishing a Nonfiction Book on Kindle
-
11-02-2020
The Best Creative Prompt Ideas for Nonfiction Writing
-
09-02-2020
How Can Writing a Nonfiction Book About a Topic Help My Business
-
06-02-2020
Nonfiction Publishing Success With KDP
-
05-02-2020
An Introduction to Nonfiction Paragraphs
-
03-02-2020
How to Master the Nonfiction Style of Writing
-
02-02-2020
The Best Words for Nonfiction Descriptive Writing
-
29-01-2020
How to Find the Best Editor for a Nonfiction Book
-
27-01-2020
How to Get a Nonfiction Book Printed and Bound for a Lot Less
-
24-01-2020
What Are the Rules for Writing a Paragraph that Engages With Readers?
-
21-01-2020
Nonfiction Book Publishing Companies Near Me
-
15-01-2020
How to Write the Perfect Nonfiction Introductory Paragraph (with an Example)
-
06-01-2020
How to Make a Book Cover Stand Out: 5 Best Practices for Nonfiction Authors
-
06-01-2020
Parts of a Nonfiction Book in Order: A Comprehensive List for Authors
-
06-01-2020
How to Get a Copyright for a Nonfiction Book
-
03-12-2019
21 Inspiring Quotes for a First-Time Nonfiction Writer
-
18-11-2019
A Comprehensive List of Punctuation Marks
-
15-11-2019
5 Elements That Will Make Your Book Back Cover Design Stand Out [With Examples]
-
14-11-2019
Great Blurb Examples for Books (A Guide for Nonfiction Authors)
-
13-11-2019
Paragraph Types with Examples: A Primer for Nonfiction Authors
-
12-11-2019
12 Nonfiction Short Author Bio Examples Plus 6 Steps to the Perfect Bio
-
05-11-2019
How to Make My Nonfiction Writing Better in 9 Easy Steps
-
01-10-2019
Legal Disclaimer Examples for Books
-
25-09-2019
Copyright Page: Everything You Need To Know and Why you Need It
-
25-09-2019
How to Create the Copyright Page of Your Book [with 6 Ready-to-Use Fiction and Nonfiction Samples]
-
22-09-2019
5 Great Reasons to Join a Writers Association
-
28-08-2019
The 4 Types of Editing Required to Create a Nonfiction Bestseller
-
14-08-2019
10 Must-Follow Editing Tips for Nonfiction Authors
-
07-08-2019
How to Find Ideal Writing Spaces: A Guide for Nonfiction Writers
-
01-08-2019
5 Book Editing Benefits for Nonfiction Writers
-
31-07-2019
How to Self Edit a Nonfiction Book in 7 Simple Steps
-
30-07-2019
How to Find the Best Nonfiction Book Writing Services
-
29-07-2019
Writing a Nonfiction Book for the First Time: Must Dos and Don’ts
-
28-07-2019
The Best Book Writing Advice for Nonfiction Authors
-
27-07-2019
The 5 Cardinal Book Writing Rules for Nonfiction Authors
-
26-07-2019
5 Steps to Develop Compelling Nonfiction Book Writing Ideas
-
25-07-2019
10 Editing Tips to Make Your Nonfiction Book Stand Out
-
24-07-2019
Looking for a Good Nonfiction Writing Skills Article? Follow These Guidelines
-
23-07-2019
How to Improve Your Nonfiction Writing Skills in 9 Easy Steps
-
22-07-2019
The Ultimate Book Writing Checklist for Nonfiction Authors
-
21-07-2019
The Ultimate Blueprint For Writing Your First Nonfiction Book
-
20-07-2019
How to Nail the Edit of a Nonfiction Book Cover
-
19-07-2019
The 12-Step Nonfiction Book Writing Process
-
18-07-2019
12 Critical Steps to Writing a Nonfiction Book
-
17-07-2019
How to Prepare for a Nonfiction Book Launch Event
-
16-07-2019
How to Find Book Cover Artists for Your Nonfiction Book
-
15-07-2019
How to Make a Nonfiction Book Cover in 5 Steps
-
14-07-2019
9 Book Cover Ideas that Will Turbocharge Your Nonfiction Sales
-
13-07-2019
The Ultimate Guide for Nonfiction Print On Demand Books
-

12-07-2019
10 Powerful Book Launch Ideas for New Nonfiction Authors
-
11-07-2019
5 Essential Book Writing Tips for Nonfiction Authors
-
10-07-2019
7 Must Use Book Layout Design Rules for Nonfiction Titles
-
09-07-2019
5 Book Cover Design Principles for Nonfiction Authors
-
08-07-2019
5 Great Book Title Ideas to Rock Your Nonfiction Sales
-
07-07-2019
5 Benefits of Self-Publishing on Amazon for Nonfiction Authors
-
06-07-2019
The True Cost of Self-Publishing on Amazon for Nonfiction Authors
-
05-07-2019
Self Publishing vs. Traditional Publishing: Pros and Cons
-
04-07-2019
Self-Publishing Pros and Cons: The Ultimate Guide for Nonfiction Authors
-
03-07-2019
14 Self-Publishing Tips to Turbo Charge your Nonfiction Book Sales
-
02-07-2019
How to Self Publish with Kindle (A Guide for Nonfiction Authors)
-
01-07-2019
Self-Publishing on Amazon: Pros and Cons for Nonfiction Authors
-
30-06-2019
How to Self Publish on Amazon: A Guide for Nonfiction Authors
-
29-06-2019
How to Self-Publish Nonfiction with Success
-
28-06-2019
Self-Publishing Quotes – What to Expect for Your Nonfiction Book
-
27-06-2019
How to Hire A Ghostwriter to Write Nonfiction that Tips the Scales
-
26-06-2019
Want to Hire a Writer for a Nonfiction Book? Start Here
-
25-06-2019
3 Steps to Follow Before You Find a Nonfiction Ghostwriter
-
24-06-2019
How to Get a Copyright for a Nonfiction Book in 4 Easy Steps
-
23-06-2019
What’s the Copyright Cost for a Nonfiction Book?
-
22-06-2019
How to Copyright a Book and Protect Your Work from Plagiarism
-
21-06-2019
5 Tips to Hire a Ghostwriter to Work with Nonfiction Authors
-
20-06-2019
How to Hire a Professional Ghostwriter to Write your Nonfiction Book
-
19-06-2019
How to Find the Best Freelance Writing Service for Nonfiction
-
18-06-2019
Need an Editor for Your Nonfiction Book?
-
17-06-2019
How to Find a Nonfiction Book Editor
-
16-06-2019
All You Need to Know About Nonfiction Developmental Editing Rates
-
15-06-2019
How to Find the Best Copy Editing Services for Nonfiction Authors
-
14-06-2019
Nonfiction Book Editors Near Me
-
13-06-2019
How to Properly Vet an Editing Company
-
12-06-2019
What are typical proofreading rates for nonfiction books?
-
11-06-2019
If You Can Afford it, Hire a Book Writer: 9 Compelling Reasons for Nonfiction Authors
-
10-06-2019
How to Find the Best Content Editor for Your Nonfiction Book
-
09-06-2019
Why You Need Developmental Editing Done on Your Nonfiction Book
-
08-06-2019
Learn How to Promote a Nonfiction Book on Social Media with Success
-
07-06-2019
How Do I Promote My Self-Published Nonfiction Book for Top Sales?
-
06-06-2019
5 Key Marketing Ideas Every Nonfiction Authors Should Implement
-
05-06-2019
Book Marketing Companies You Should Definitely Avoid
-
04-06-2019
20 Powerful Ideas to Promote Your Nonfiction Book
-
03-06-2019
How to Create a Book Marketing Plan that Turbo Charges your Sales
-
02-06-2019
How to Hire the Best Book Promotion Services for Nonfiction Authors
-
01-06-2019
Learn How Hiring a Marketing Consultant Will Help You Sell a Lot More Books
-
31-05-2019
How to Get Reviews on Amazon for Your Nonfiction Book
-
30-05-2019
How to Promote Your Book to Rank High on Amazon Nonfiction
-
29-05-2019
How to Find the Best Book Marketing Services for Nonfiction
-
28-05-2019
Learn How to Market a Nonfiction Book to Get Solid Results
-
27-05-2019
7 Highly Effective Book Promotion Tactics for Nonfiction Authors
-
26-05-2019
Write Your Own Book and Become an Expert: 11 Reasons Why You Should
-
25-05-2019
The 5 Steps of Writing a Book Outline to Maximize Nonfiction Sales
-
24-05-2019
The Best Self-Publishing Sites for Nonfiction Authors
-
23-05-2019
Make Your Own Book and Add 7 Revenue Streams to Your Business
-
22-05-2019
Follow This Writing Plan to Create Your First Nonfiction Book
-
21-05-2019
How to Make a Book That Generates High Paid-Speaking Fees
-
20-05-2019
Write a Book And Dominate Your Industry: 11 Game-Changing Benefits
-
19-05-2019
Learn 5 Easy Steps to Self-Publish a Book If Your Nonfiction Manuscript Is Ready
-

18-05-2019
How to Self Publish a Book in 7 Steps: A Guide for Nonfiction Writers
-
17-05-2019
How Much Does It Cost to Self Publish a Nonfiction Book that Sells Well
-
16-05-2019
7 Time-Saving Steps to Publish a Nonfiction Book in Record Time
-

15-05-2019
Self Publishing on Amazon KDP: Everything Nonfiction Authors Need to Know
-
14-05-2019
How to Find The Ideal Nonfiction Book Publishing Company for You
-
13-05-2019
What to Look For in a Top Book Self-Publishing Company
-
12-05-2019
Self-Publishing Companies to Avoid: 7 Warning Signs to Look Out For
-
11-05-2019
5 Book Cover Maker Mistakes to Avoid When You Design a Nonfiction Cover
-
10-05-2019
The Top 7 Book Structure Templates for Nonfiction Authors
-
09-05-2019
Learn How to Outline Your Nonfiction Book in 10 Easy Steps Like the Pros
-
08-05-2019
5 Mistakes to Avoid When You Lay Out a Nonfiction Book
-

07-05-2019
7 Book Planning Best Practices Used By Nonfiction Pro Authors
-
06-05-2019
Learn the Best Book Structure to Maximize Nonfiction Sales
-

05-05-2019
7 Simple Steps to Writing a Powerful Nonfiction Book
-
04-05-2019
Learn the Ultimate Book Format Guidelines for Nonfiction Authors
-
03-05-2019
How to Format a Manuscript Like A Pro (A Guide for Nonfiction Writers)
-
02-05-2019
I Want to Write a Nonfiction Book, Where Do I Start?
-
01-05-2019
Learn How to Write Nonfiction: 12 Tips from The Pros
-
30-04-2019
How to Use Expository Writing in Nonfiction to Establish Your Expert Credentials
-
29-04-2019
5 Narrative Writing Steps for Nonfiction Books
-

28-04-2019
How To Use Descriptive Writing To Write A Book That Readers Can’t Put Down
-

27-04-2019
10 Next-Level Persuasive Writing Strategies for Nonfiction Authors
-

26-04-2019
How to Use All 4 Writing Styles to Create an Exciting Nonfiction Book
-

25-04-2019
10 Tips for Writing a Bestselling Nonfiction Book
-
24-04-2019
7 Key Writing Strategies Used by Bestselling Nonfiction Authors
-

23-04-2019
5 Professional Paragraph Writing Tips for First-Time Authors
-
22-04-2019
The 7 Key Rules for Writers of Outstanding Nonfiction Books
-
21-04-2019
How to Become a Great Book Writer in Business Nonfiction
-
20-04-2019
How to Find the Ideal Writing Coach for Your Nonfiction Book
-

19-04-2019
The 10 Must-Have Writing Skills For Nonfiction Authors
-
18-04-2019
How to Hire the Ideal Professional Writer for Your Nonfiction Book
-

17-04-2019
The Best Book Writing Apps for Nonfiction Authors
-

16-04-2019
How to Outline a Nonfiction Book in 5 Simple Steps
-
15-04-2019
How Much Does a Ghostwriter Cost to Write a Book for Your Business?
-

14-04-2019
How to Find a Great Nonfiction Book Editor and Filter Out the Bad Ones
-
13-04-2019
10 Nonfiction Book Layout Tips That Will Glue Your Audience to the Page
-
12-04-2019
How to Write a Compelling Book Introduction That Will Move the Needle
-
11-04-2019
How to Mind Map a Book: A Step-by-Step Guide for Nonfiction Authors
-
10-04-2019
How To Come Up With Nonfiction Book Ideas That Sell
-

09-04-2019
How to Grow Your Business Writing a Nonfiction Book
-

08-04-2019
The Most Effective Writing Exercises for Busy Business People
-

07-04-2019
How to Come Up With Killer Book Titles for Your Nonfiction Book
-
06-04-2019
Learn 10 Powerful Writing Habits to Fast Track Your Nonfiction Book
-

05-04-2019
How Long Does it Take to Write a Book to Help Grow Your Business?
-

04-04-2019
How to Write a Book in 12 Steps: A Must-Read Guide for Nonfiction Authors